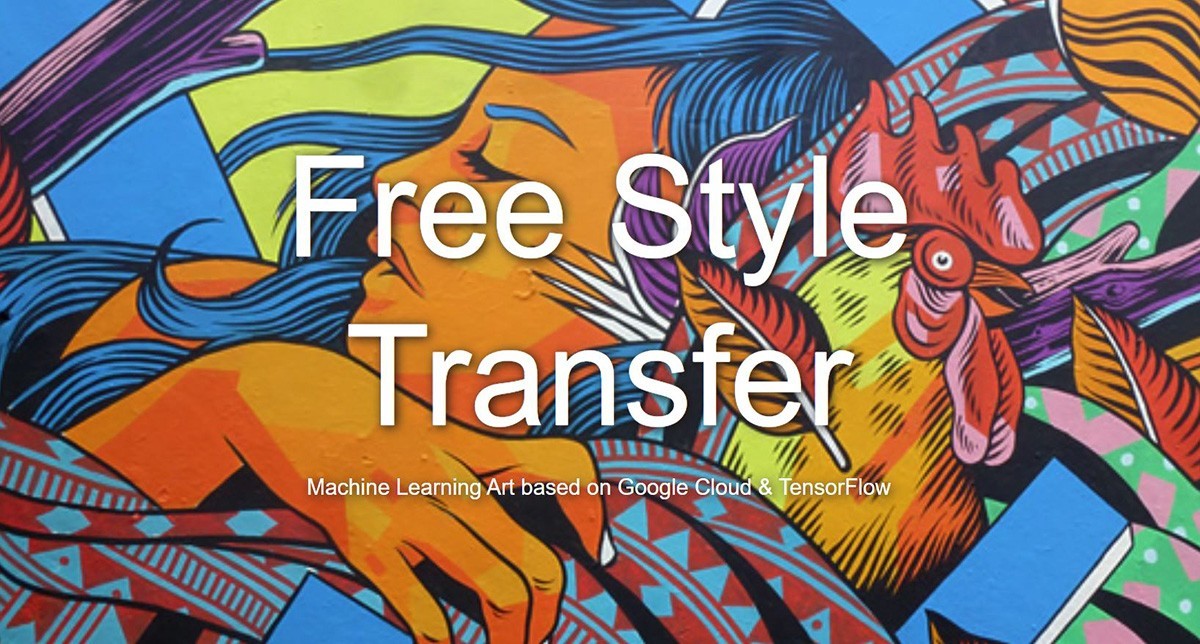
Neural Style Transfer Model
by Christoph Mittendorf
Posted on November 21, 2020
The Goal:
In this article, we will explore Neural-Style-Transfer. In particular, we will build a free Neural Style Transfer web-application that runs entirely on Google Cloud. The idea is to use predominately Cloud services and Open-Source technologies to make the app tangible and accessible for everyone. In detail, to build and run the web-application, we will leverage:
Tl;dr: Machine Learning does not have to be a black-box. Applications that use ML generally consist of different building blocks. My motivation to write this article is entirely focused on educational purposes. Further, I want to introduce a simple guide on how to deploy ML applications in the Cloud and make them accessible to the wider public. In this blog post, I am only going to outline the steps on how to deploy the machine learning model and web application. I uploaded the entire code in a github repo. The repo does hold the following:
- app.yaml (to specify the python runtime)
- cron.yaml (to avoid shutting down of the Google app engine)
- main.py (the python application with the ml model)
- requiremenrs.txt (to specify the dependencies)
- A static folder (including the web interface and the images / favicons used)
Google App Engine:
Google App Engine is a Platform as a Service and cloud computing platform for developing and hosting web applications in Google-managed data centers. Applications are sandboxed and run across multiple servers. App Engine offers automatic scaling for web applications—as the number of requests increases for an application, App Engine automatically allocates more resources for the web application to handle the additional demand.
Google Cloud Storage:
Google Cloud Storage is a RESTful online file storage web service for storing and accessing data on Google Cloud Platform infrastructure. The service combines the performance and scalability of Google's cloud with advanced security and sharing capabilities. It is an Infrastructure as a Service (IaaS), comparable to Amazon S3 online storage service. Contrary to Google Drive and according to different service specifications, Google Cloud Storage appears to be more suitable for enterprises.
TensorFlow Hub:
TensorFlow Hub is a repository of trained machine learning models ready for fine-tuning and deployable anywhere. Reuse trained models like BERT and Faster R-CNN with just a few lines of code.
Flask:
Flask is a lightweight WSGI web application framework. It is designed to make getting started quick and easy, with the ability to scale up to complex applications. It began as a simple wrapper around Werkzeug and Jinja and has become one of the most popular Python web application frameworks. Flask offers suggestions, but doesn't enforce any dependencies or project layout. It is up to the developer to choose the tools and libraries they want to use. There are many extensions provided by the community that make adding new functionality easy.
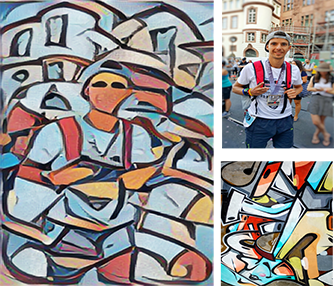
Let's jump right into the infrastructure and go through the basics: THE IDEA - We want to build a Web-App that runs entirely on Google Cloud and allows users to perform Neural Style Transfer for free on their desktop and mobile devices. In this regard, we will rebuild the NST functionality of the Google Art & Culture App in Google Cloud while adding new features & functionalities, such as adding 'custom styles'. It turns out, the style of an image can be described by the means and correlations across the different feature maps. However, for the purpose of this article, we will mostly focus on the tools that we will use to build the application, rather than going into the mathematics of the ML model.
THE BACKGROUND - Neural Style Transfer (NST) refers to a class of software algorithms that manipulate digital images, or videos, in order to adopt the appearance or visual style of another image. NST algorithms are characterized by their use of deep neural networks for the sake of image transformation. Common uses for NST are the creation of artificial artwork from photographs, for example by transferring the appearance of famous paintings to user-supplied images or photographs.

THE RESEARCH - I want to highlight the seminal work of Gatys et al. (2016) who demonstrated the power of Convolutional Neural Networks (CNNs) in creating artistic imagery. Their work has inspired a lot of machine learning researchers. As of 2020, we have numerous pretrained models, such as from TensorFlow & PyTorch for NST. Today we find multiple applications that leverage NST to produce machine learning art based on the early work from Gatys et al. (2016). However, besides some online applications that charge money for usage, most of the ML models available never got deployed. With this article, I want to highlight that the deployment process of ML models has never been easier as of 2020. In the next section, I am going to guide you through a step-by-step guide on how to build and deploy ML models entirely on Google Cloud.
Let's build the application.
THE THINGS WE NEED - Building on what we have learned from building the Disney Classification model, I planned to follow a similar exercise leveraging Google Cloud technologies together with a micro web framework for Python. The plan for the free Style Transfer App was the following:
- Step 1: Build a web interface that allows users to upload their images and styles.
- Step 2: Set up a Python environment to run the Neural Style Transfer Model.
- Step 3: Set up Storage for hosting the style images.
- Step 4: Overcome the Challenges & Connect everything together.
- Step 5: Get a domain and make the Application available for free.
Web interface - The Essentials
In order to build the web interface for the application, we will use the grid system from bootstrap4 to allow a responsive web page. As the foundation is set up, we will start building the upload functionality that allows users to upload an image or photograph to the site. From here on, we will refer to the uploaded image as "content image" in addition to the "style image" which is the complementary image used for the style transfer. The uploaded image can be encoded to base64 in order to send it to the python server on Google App Engine, which we will set up in the next section. In this regard, we will build a function that converts both "jpg & png" image files to base64 using JavaScript magic. After converting the file to base64, we will use a post request method from jQuery to send the data to the Python server. The Python server will respond with the prediction of the style transfer model.

Besides, building the functionality for the 'content image', we will build a style picker for the 'style images' that allow the users to select their preferred image style. Our approach will be twofold: First, we will build a custom image carousel using pure CSS with my personal choice of nice paintings and graffiti styles. In this regard, special shout-out to EvEnglert for providing me some of her work.

This being said, I do not claim any copyright on the provided styles used in the web application. In addition to the provided style selection, we will build a custom style upload function for users that allows them to upload their own 'style images' to make the app more flexible. For example, this is a feature that is not available in the Google Cloud & Culture application. Lastly, we need to build the transfer function that triggers the post request and handles the response on client side while providing a nice visualization of the model output that the user can directly download and share with friends and family.
The Python Server and Google Cloud Storage - The Essentials
Remember that we want to run the application entirely on Cloud Services. Hence, we will use a microframework (Flask) that is supported by Google App Engine and allows us to use a custom Python runtime. For being state-of-the-art, we will pick Python 3.8 which is compatible with TensorFlow 2.3.0 and TensorFlow-Hub 0.9.0. (Note: These are the latest supported version available on App Engine by Nov. 2020).

On the server side, we will introduce the Flask endpoint for the (a) web interface and the (b) transfer function which we have set up via jQuery in the section before. So in case an user uploads an image, selects a pre-provided style and triggers the post request on the web interface, the base64 data will be received by the transfer endpoint on the server side. Here the decoded base64 data will be encoded and resized to a tensor that fits our NST model. In parallel, a file request will be initiated to download the select style image. In preparation for that, we will set up a Google Cloud Storage Bucket where all provided 'style images' are hosted.

Using this approach, the python application can directly download the style files form GCP without the need to transfer them from the frontend. Similarly, in case the user chooses to upload a 'custom style', the received base64 string will be encoded and resized in the identical manner as the 'content image'. Both the 'content image' and the 'style image' (respectively 'custom style image') are fed into the NST model from TensorFlow. After both inputs have been provided to the model, we can predict the New Image. In other words, we can start producing our own ARTWORK. Last thing to do is to get a cool domain name. Luckily, I found the .icu domains are quite popular and cheap at the moment. Further, we want to make sure that everyone can use the application for free - therefore, I bought Free-Style-Transfer.icu
I think it sounds alright ;)

Some Challenges:
After building the functionality outlined above, I came across some challenges that took me quite some time and effort to solve.
- Users most likely will use their phones in order to provide photos and images that have been captured in different orientations (eg. landscape, portrait). When encoding image information to base64 the exif metadata gets lost. Thus, the orientation gets messed up when receiving the model prediction back on the web-interface. In this regard, I needed to write a function to save the exif orientation and client side and apply this orientation back to the model prediction (see github repo).
- In order to run TensorFlow 2.x on Google App Engine - I needed to configure a larger instance class than provided by default when opting for a Python 3.8 runtime with a 'standard' environment. Furthermore, it was quite a struggle to figure that TensorFlow-Hub 0.9.0 seems to have compatibility problems with Python 3.7 on Google App Engine.
- Instances on Google App Engine seem to shut-down by default after 60 minutes. This is per-se not a problem, however, spinning up a new instance does take some time. In detail, a cold-start of an instance does take up to 30 seconds, which surely causes a bad user experience. A solution for this challenge was preventing at least one instance from shutting down by running a cron-job on an empty function on the server side (Hint: Make sure to deploy your cron.yaml separately on Google App Engine, as it does not get deployed via 'gcloud app deploy').
All in all this is a very exciting project with a high learning curve. In addtion, ML models with visual output are generally cool and more fun to build. For those of you who are more interested in code work - make sure to check-out the github repo.
Cheers Chris
Disclaimer: The Neural Style Transfer Application is built purely for educational purposes. In this regard, I do not claim any copyrights on any of the image material used to run this application. In case you have any questions, feel free to reach out to me via LinkedIn or at hello@epicml.net.